

Screen recording has become an essential tool for various purposes, from creating tutorials and presentations to capturing memorable gaming moments or troubleshooting technical issues. Whether you need to demonstrate a software feature, share gameplay, or report a bug, knowing how to screen record on your phone can be incredibly helpful. This article provides a comprehensive guide on how to screen record on any phone, regardless of the operating system (OS), whether it’s Android or iOS. Learn the ins and outs of capturing your phone’s screen with our step-by-step instructions and master the art of screen recording.
Navigating the various methods for screen recording can be confusing with the many different phone models and OS versions. This guide aims to simplify the process by providing clear and concise instructions on how to screen record on various devices. We will cover the built-in screen recording functionalities of both Android and iOS, as well as explore alternative methods for devices that may not have native screen recording capabilities. By the end of this article, you will be equipped with the knowledge to confidently screen record on any phone, empowering you to create engaging content, provide effective technical support, and share your digital experiences with ease.
Why Use Screen Recording?
Screen recording is a versatile tool with a wide range of applications. It allows you to capture exactly what you see on your screen, creating a video record of your activity. This can be invaluable for various purposes, both personal and professional.
Troubleshooting and Reporting Bugs: Effectively demonstrate software issues or glitches by visually recording the steps leading to the problem. This provides developers with clear evidence for efficient debugging.
Creating Tutorials and Demonstrations: Easily produce how-to guides and training materials by recording your screen while performing a task or explaining a process. This provides a visual and engaging learning experience.
Gaming and Entertainment: Capture and share your best gaming moments, create walkthroughs, or simply record funny glitches. This enables you to showcase your skills and engage with online communities.
Presentations and Webinars: Enhance your presentations and webinars by recording your screen to create engaging visual aids. This can be especially useful for demonstrating software features or presenting online tutorials.
Built-in Recording Tools
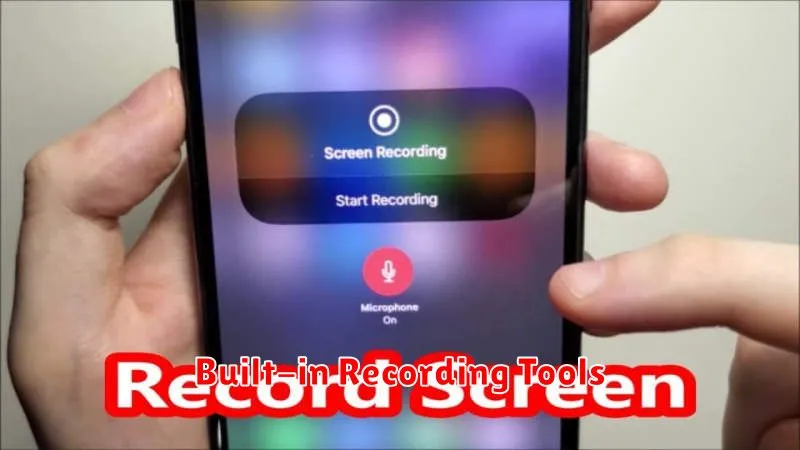
Many modern smartphones include native screen recording functionalities. These built-in tools offer a convenient way to capture your screen activity without needing third-party apps. Accessing these tools typically involves a quick toggle in your phone’s quick settings or control center.
The specific steps to initiate a screen recording may vary slightly depending on your phone’s manufacturer and operating system. Consult your device’s user manual or search online for instructions related to your specific phone model.
Common features of built-in screen recorders often include options to record audio from the device’s microphone or internal audio, set video resolution, and enable or disable screen touches. Some devices may also offer the ability to annotate the screen during recording.
Adjusting Audio and Video Settings
Most screen recording tools offer various customization options for audio and video. Understanding these settings is crucial for producing a high-quality recording.
Video Settings
Resolution: Select the recording resolution. Higher resolutions (e.g., 1080p) result in clearer videos but larger file sizes. Lower resolutions (e.g., 720p) reduce file size but sacrifice some clarity.
Frame Rate (fps): This setting determines how smooth the video appears. A higher frame rate (e.g., 60fps) is ideal for recording fast-paced action, while a lower frame rate (e.g., 30fps) is suitable for static content.
Orientation: Choose between portrait and landscape mode depending on your content.
Audio Settings
Source: Determine the audio source. Options may include internal audio (system sounds), microphone, or both. Select the appropriate source based on your recording needs.
Volume: Adjust the recording volume to ensure clear audio.
Using Third-Party Recording Apps
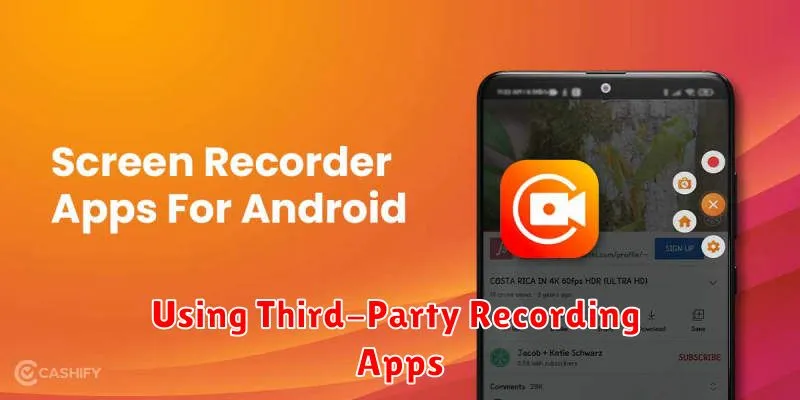
If your phone’s built-in screen recording functionality is limited or nonexistent, third-party apps offer a robust alternative. These apps, available on various app stores, often provide advanced features.
Locating a Suitable App: Search your device’s app store for “screen recorder.” Look for apps with positive reviews and ratings. Key features to consider include recording resolution, frame rate, audio recording options (internal/external audio), and editing tools.
Installation and Setup: After downloading and installing the chosen app, carefully review any required permissions. Grant necessary permissions for screen recording and audio capture. Some apps may require additional setup steps, so follow the on-screen instructions.
Recording Process: Initiating a recording typically involves starting the app and tapping a record button. The app may present options to configure recording settings before starting. Once recording begins, a notification or overlay icon usually indicates an active recording session. Stopping the recording usually involves tapping the same icon or using a notification control.
Recording with Internal Audio
Recording internal audio alongside your screen capture can significantly enhance your recordings, especially for tutorials, gameplay videos, or presentations. However, directly capturing internal audio can be challenging due to system limitations on certain devices.
Android devices often have built-in screen recording features. Some manufacturers provide an internal audio recording option within their screen recorder settings. If unavailable, third-party apps specifically designed for internal audio recording may be required. Consult your device’s documentation or explore the app store for suitable recording applications.
iOS devices generally require workarounds for internal audio recording. Some screen recording apps utilize the microphone to capture internal audio, but this method may result in lower quality recordings. Alternatively, for certain applications like music or gaming, routing audio through a virtual audio cable connected to a computer may be an option, though more technically complex.
Always test your recordings after capturing to ensure the desired audio quality and content are being properly recorded. If the internal audio is faint or absent, reconfigure your settings and try again.
Saving and Sharing the File
Once you’ve finished recording your screen, the next step is saving the captured video. The saving process typically happens automatically, but the location may vary depending on your device and operating system. Check your phone’s default screen recording settings or your photo gallery for the recently recorded video. It’s often stored in a dedicated “Screen Recordings” or similar folder.
Sharing your screen recording is usually straightforward. After locating the saved file, look for the share icon, which is commonly represented by an upward arrow with a branching line or a box with an arrow emerging from it. Tapping this icon will present various sharing options, such as email, messaging apps, social media platforms, or cloud storage services. Select your desired platform and follow the prompts to share your recording.
Best Practices for Clarity
Creating a clear and effective screen recording involves more than just capturing your screen. Consider these best practices to ensure your viewers easily understand the information presented.
Planning
Before you start, plan what you want to demonstrate. A clear objective helps maintain focus and prevents rambling. Having a script or outline can be beneficial, especially for longer recordings.
Audio
Minimize background noise. A quiet environment ensures your voice, or any accompanying narration, is clearly audible. If narrating, speak clearly and at a consistent pace.
Visuals
Keep the screen uncluttered. Close unnecessary applications and tabs to minimize distractions. Use a consistent cursor size – make it large enough to be easily visible, but not so large that it becomes distracting.
Pacing
Maintain a moderate pace throughout the recording. Avoid rushing through steps or lingering too long on single screens. Give viewers adequate time to process the information presented.