

Unlock the secrets of captivating night photography with your mobile camera. This guide delves into essential night photography tips, empowering you to capture stunning low-light images using just your phone. Learn how to master the art of mobile night photography and transform ordinary nighttime scenes into extraordinary visual masterpieces. Whether you’re aiming for breathtaking cityscapes, mesmerizing star trails, or dramatic portraits under the moonlit sky, these practical techniques will elevate your mobile camera skills and unlock the full potential of your device for capturing the beauty of the night.
Explore a comprehensive range of night photography tips specifically tailored for mobile cameras. From understanding the fundamental principles of night photography, such as using manual mode and adjusting ISO, shutter speed, and white balance, to exploring advanced techniques like long exposure and light painting, this guide provides invaluable insights to help you capture stunning night photos. Discover how to overcome common challenges of low-light photography, such as image noise and blur, and achieve professional-looking results with your mobile camera. Embark on this enlightening journey into the realm of mobile night photography and unlock the magic of capturing the night’s allure.
Understanding Low Light Challenges
Low light environments present several key challenges for mobile photography. The most significant is the lack of available light. This directly impacts the camera’s ability to capture a well-exposed image.
With limited light, the camera sensor struggles to gather enough information to produce a clean, bright photo. This often results in digital noise, which appears as grainy or speckled artifacts in the image, degrading overall image quality.
Another challenge is slow shutter speeds. To compensate for low light, the camera uses slower shutter speeds to allow more light to reach the sensor. This can lead to motion blur if the camera or the subject moves during the exposure.
Finally, autofocus systems can struggle in low light, making it difficult to achieve sharp, accurately focused images. The camera may hunt for focus or fail to lock onto the subject entirely.
Using Night Mode Effectively
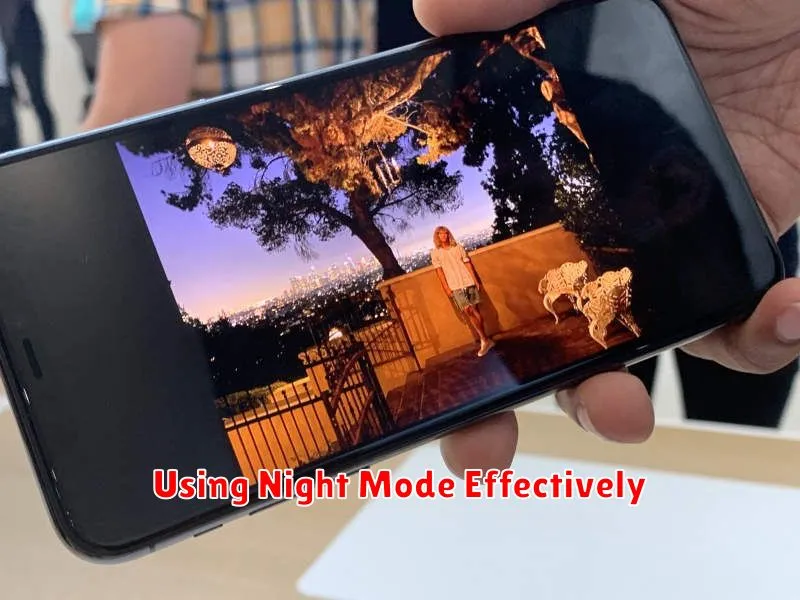
Night Mode is a powerful feature on modern mobile cameras designed to improve low-light photography. It works by taking multiple exposures over a short period and then combining them to create a brighter, more detailed image.
To use Night Mode effectively, stability is key. A tripod is ideal, but if one isn’t available, find a stable surface like a wall or railing to brace your phone against. Even a small amount of movement during the exposure can result in blurry images.
While Night Mode automatically determines the optimal exposure time, some phones offer manual controls. Experimenting with these can yield interesting results. A longer exposure captures more light, useful for very dark scenes, but increases the risk of blur. Conversely, a shorter exposure might be preferable for scenes with some ambient light.
Be mindful of your subject. Moving subjects will likely appear blurry during long Night Mode exposures. This feature is best suited for static scenes like landscapes or cityscapes.
Keep the Camera Steady
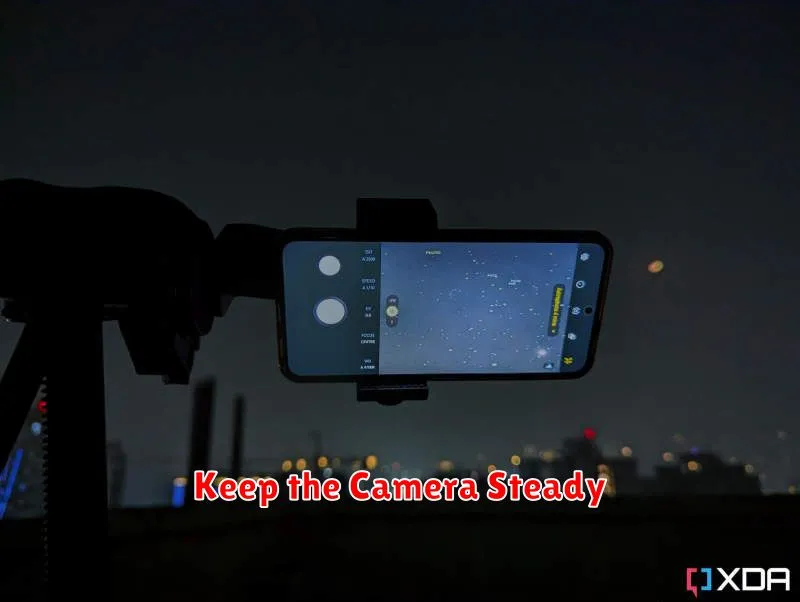
Camera shake is a major culprit behind blurry night photos. Stability is absolutely crucial in low-light conditions due to the longer exposure times required to gather enough light. Even the slightest movement can result in a blurred image.
There are several ways to mitigate this. Consider using a tripod for optimal stability. If a tripod isn’t available, try bracing your phone against a solid surface like a wall, railing, or even a stack of books. This can significantly reduce unwanted movement.
Holding your phone with both hands and tucking your elbows into your sides can also provide added stability. Activating the self-timer or using a remote shutter release (if available) can further eliminate shake introduced by pressing the shutter button.
Adjust Exposure Manually
Most mobile cameras offer manual exposure controls, a crucial feature for night photography. Taking control of the exposure allows you to brighten or darken the scene to your liking, compensating for the camera’s automatic settings which often struggle in low light.
Typically, this involves adjusting the ISO and shutter speed. A lower ISO value reduces noise (graininess) but requires a longer shutter speed. A longer shutter speed captures more light, but increases the risk of blur from camera shake. Finding the right balance between these settings is key.
Look for an “EV” (Exposure Value) or “+/-” icon in your camera app. Tapping this will usually bring up a slider to adjust the exposure compensation. Sliding to the plus side brightens the image, while sliding to the minus side darkens it.
Use Artificial Light Creatively
Artificial light sources offer incredible potential for night photography with your mobile camera. Don’t be afraid to experiment with different types of light.
Streetlights, neon signs, and even car headlights can be incorporated into your compositions to add drama and interest. Consider how these light sources interact with your subject and the surrounding environment.
Flash can be useful, but use it sparingly. Direct flash often washes out details and creates a harsh, unnatural look. Try diffusing your flash by covering it with a thin white material to soften the light. Alternatively, consider using a small external LED light for more control.
Experiment with light painting. By using a long exposure, you can “paint” light into your scene with a flashlight or other light source. This technique can add a unique and artistic element to your night photos.
Editing Night Photos Afterwards
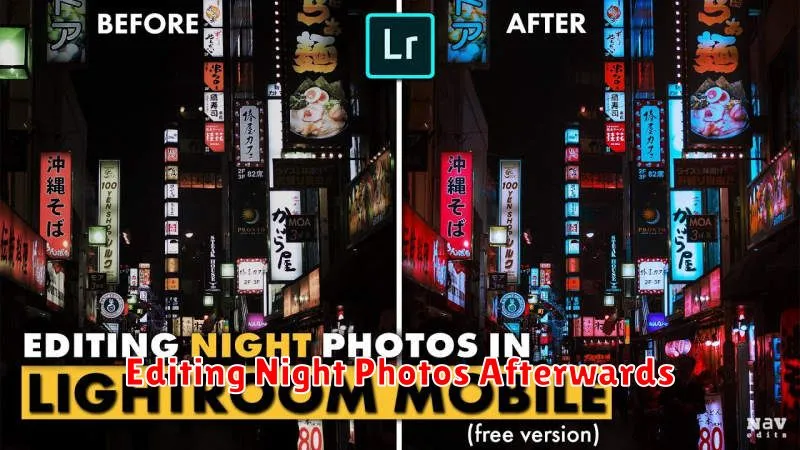
Even with the best preparation, night photos taken on mobile cameras can often benefit from post-processing.
Brightness and Contrast: Carefully adjust the brightness to bring out details without overexposing the image. Increasing contrast can help define the separation between light and shadow, adding depth to the photo.
Noise Reduction: Night photos are susceptible to noise (graininess). Use a noise reduction tool sparingly to smooth out the grain without losing too much detail.
Sharpening: A touch of sharpening can enhance details, but avoid over-sharpening, which can create artifacts.
White Balance: Artificial light sources can create color casts. Adjust the white balance to achieve natural-looking colors or experiment with different white balance settings for creative effects.
Avoiding Grain and Blur
Grain and blur are common issues in night photography, especially with mobile cameras. Minimizing movement is crucial. Use a stable surface like a tripod or lean against a wall. Even slight vibrations can introduce blur.
Adjusting your camera settings can also greatly impact image quality. Enable your camera’s Night Mode if available. This feature combines multiple exposures to reduce noise and improve detail. Manually setting your ISO to the lowest possible setting will also help reduce grain, though it may require longer exposure times.
Consider using your camera’s timer. This eliminates the movement caused by pressing the shutter button. Alternatively, use a remote shutter release if you have one.