

Elevate your mobile photography game with these top 7 camera tricks. This guide unveils essential techniques to transform your smartphone snapshots into stunning images. Whether you’re a seasoned photographer or just starting out, these mobile photography tips will help you master the art of capturing breathtaking photos using just your phone. Learn how to harness the power of your device’s camera to create professional-quality results, regardless of your skill level. From mastering composition and lighting to exploring advanced camera settings, these camera tricks will unlock the full potential of your mobile device.
Discover the secrets to capturing captivating portraits, breathtaking landscapes, and everything in between. We’ll delve into essential camera settings, explore creative composition techniques, and unveil hidden features that can dramatically improve your mobile photography. This comprehensive guide will provide you with the top 7 camera tricks you need to take your smartphone photography to the next level. Get ready to unleash your inner artist and capture moments like never before with these indispensable mobile photography tips.
Using Grid Lines for Framing
Grid lines are a powerful compositional tool available on almost every mobile camera app. Enabling this feature overlays a grid, typically based on the “rule of thirds,” onto your viewfinder. The rule of thirds suggests placing key elements of your scene along these lines or at their intersections to create a more balanced and visually appealing photograph.
How to Use Grid Lines:
- Enable grid lines: Locate this option in your camera app’s settings.
- Align key elements: Position important subjects along the grid lines or at the intersecting points.
- Straighten horizons: Use the horizontal grid lines as a guide to ensure level horizons, especially in landscape shots.
By utilizing grid lines, you can avoid placing your subject dead center, which often results in a static and less engaging image. Instead, leveraging the rule of thirds creates a sense of dynamism and draws the viewer’s eye through the frame.
Tapping to Focus Correctly
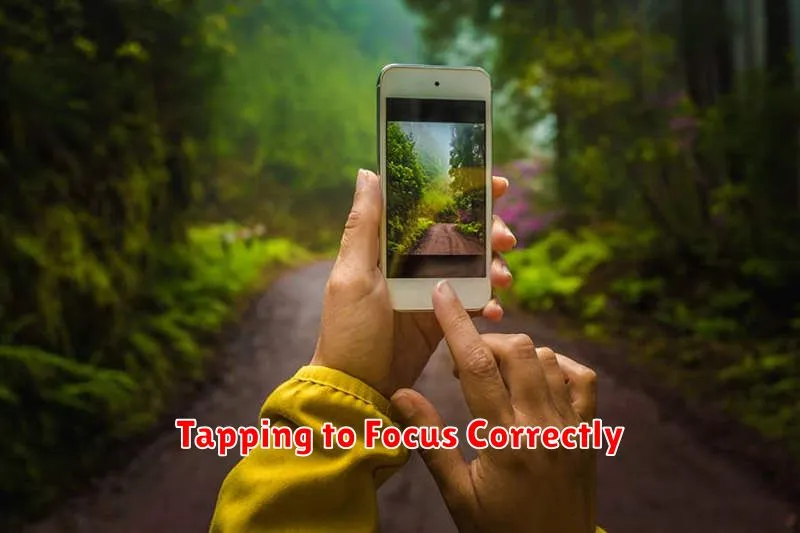
One of the most fundamental, yet often overlooked, aspects of mobile photography is using the tap-to-focus feature. Focus determines which part of your image appears sharp and clear. By default, your camera might try to focus on the center of the frame, which isn’t always ideal.
To ensure your subject is in perfect focus, simply tap on the screen where your subject is located. You should see a box or circle appear, indicating the new focus point. This tells your camera to prioritize sharpness on that particular area.
In addition to achieving accurate focus, tapping can also affect exposure. Most phone cameras will adjust the brightness based on the focus point. Tapping a darker area will brighten the image, while tapping a brighter area will darken it.
Experiment with tapping different areas of the scene to see how it affects both focus and exposure. Mastering this simple technique will significantly improve the quality of your mobile photos.
Using HDR Mode Wisely
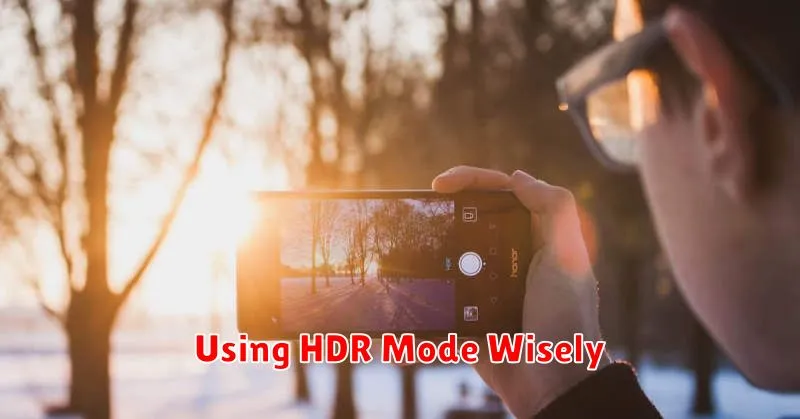
High Dynamic Range (HDR) mode is a powerful tool for capturing scenes with a wide range of light and shadow. It works by taking multiple photos at different exposures and combining them to create a single image with balanced lighting. Understanding when to use HDR is key to maximizing its effectiveness.
HDR excels in situations with high contrast, such as landscapes with bright skies and dark foregrounds, or backlit subjects. It can also be helpful for indoor scenes with mixed lighting. However, HDR is not always the best choice. Avoid using it for moving subjects, as the multiple exposures can lead to ghosting or blurring. Also, scenes with vibrant colors might appear overly saturated with HDR.
Experiment with your phone’s HDR settings. Many devices offer auto HDR, which intelligently determines when to activate the mode. Others allow manual control, giving you more creative freedom. By practicing and observing the results, you can learn to use HDR effectively to enhance your mobile photos.
Portrait Mode Depth Control
Portrait mode, also known as bokeh mode, is a powerful tool for creating professional-looking photos with a blurred background. This effect, achieved by simulating a shallow depth of field, draws attention to the subject and creates a visually appealing separation. However, many smartphone cameras allow you to control the intensity of this blur.
This depth control feature lets you fine-tune the background blur before or after capturing the image. Experiment with different levels of blur to find the perfect balance for your composition. A subtle blur can add a touch of elegance, while a more intense blur can create a dramatic, almost dreamy effect.
Using depth control effectively can significantly enhance your portrait photography. It allows you to create striking images with a polished, professional look, rivaling the quality of images taken with dedicated cameras.
Stabilizing with Volume Button Shutter
Camera shake is a common culprit behind blurry photos, especially in low-light conditions. While using a tripod is ideal, it’s not always practical. A simple yet effective technique to minimize shake and achieve sharper images is utilizing the volume button as a shutter release.
Instead of tapping the on-screen shutter button, which can introduce movement, try pressing either of your phone’s volume buttons. This provides a more stable grip and reduces the chance of jarring the camera during capture.
This trick is especially helpful when shooting in low light or when zoomed in, where even slight movements are magnified. It also allows for a more comfortable and natural shooting position, improving overall stability and control.
Taking Advantage of Ultra-Wide Lens
Many modern smartphones boast an ultra-wide lens, offering a dramatically expanded field of view. This lens type is exceptionally versatile and can significantly enhance your mobile photography.
Exaggerated Perspectives: Use the ultra-wide lens to create dynamic perspectives. Getting close to your subject while using this lens will make foreground elements appear larger and background elements smaller, adding depth and drama to your images. This is particularly effective in architectural photography and landscapes.
Capturing Vast Scenes: Ultra-wide lenses are ideal for capturing expansive scenes that a standard lens simply can’t fit in the frame. Think sweeping landscapes, large group photos, or the grandeur of a city skyline.
Creative Distortion: While often avoided, the distortion inherent in ultra-wide lenses can be used creatively. Experiment with angles and lines to create a unique, almost surreal look. Be mindful of placing subjects at the edges of the frame, as this can lead to unwanted stretching.
Editing With Built-In Tools
Most modern smartphones offer robust built-in photo editing tools. Leveraging these can significantly enhance your mobile photography without needing additional apps. These tools often include options for adjusting brightness, contrast, saturation, shadows, and highlights.
Experiment with these settings to fine-tune your images. For instance, increasing the brightness can brighten a dull photo, while adjusting the contrast can add more depth. Subtle adjustments often yield the best results. Over-editing can make your photos appear unnatural.
Many built-in editors also provide cropping and rotation tools. Use cropping to improve composition by removing distractions or tightening the focus on your subject. Rotation can correct a tilted horizon or create a more dynamic perspective.
Become familiar with the specific editing capabilities of your phone’s camera software. Utilizing these built-in tools can streamline your workflow and help you achieve professional-looking results directly from your mobile device.